
Test Procedures
This page describes the general preparation for the thermalvac tests within the LUNAR Simulation Laboratory vacuum chamber.
Background
The tests on the Kapton have several objectives:
- Replicate as closely as possible the environment of the lunar surface. This means that the Kapton must be in a vacuum, subjected to temperatures between -150 and 100 degrees Celsius, and exposed to UV light during the daytime (hot) cycle.
- Replicate as closely as possible the mechanical stress that the Kapton will be subjected to. This is done in several different ways, depending on the experiment. Deployment tests usually involve unrolling the Kapton during nighttime conditions, while durability tests last for long periods of time and the chamber undergoes many thermal cycles.
- Monitor the temperature of the Kapton and the vacuum chamber. This requires that a series of thermocouples be placed inside the chamber, and those thermocouples must be read at regular intervals.
- Monitor any other variables required for the experiment. Again, the testing methods vary depending on the type of experiment, placement within the chamber, and duration of the test.
Procedures
Step 1: Prepare the Chamber
The site of the experiments is a thermal vacuum chamber called the LUNAR Simulation Laboratory (LSL). Pictured below is the door to the chamber. It sits within a Class 100,000 clean room tent, which means that there can be no more than 100,000 particles (CO2, dust, etc.) per cubic centimeter of air.
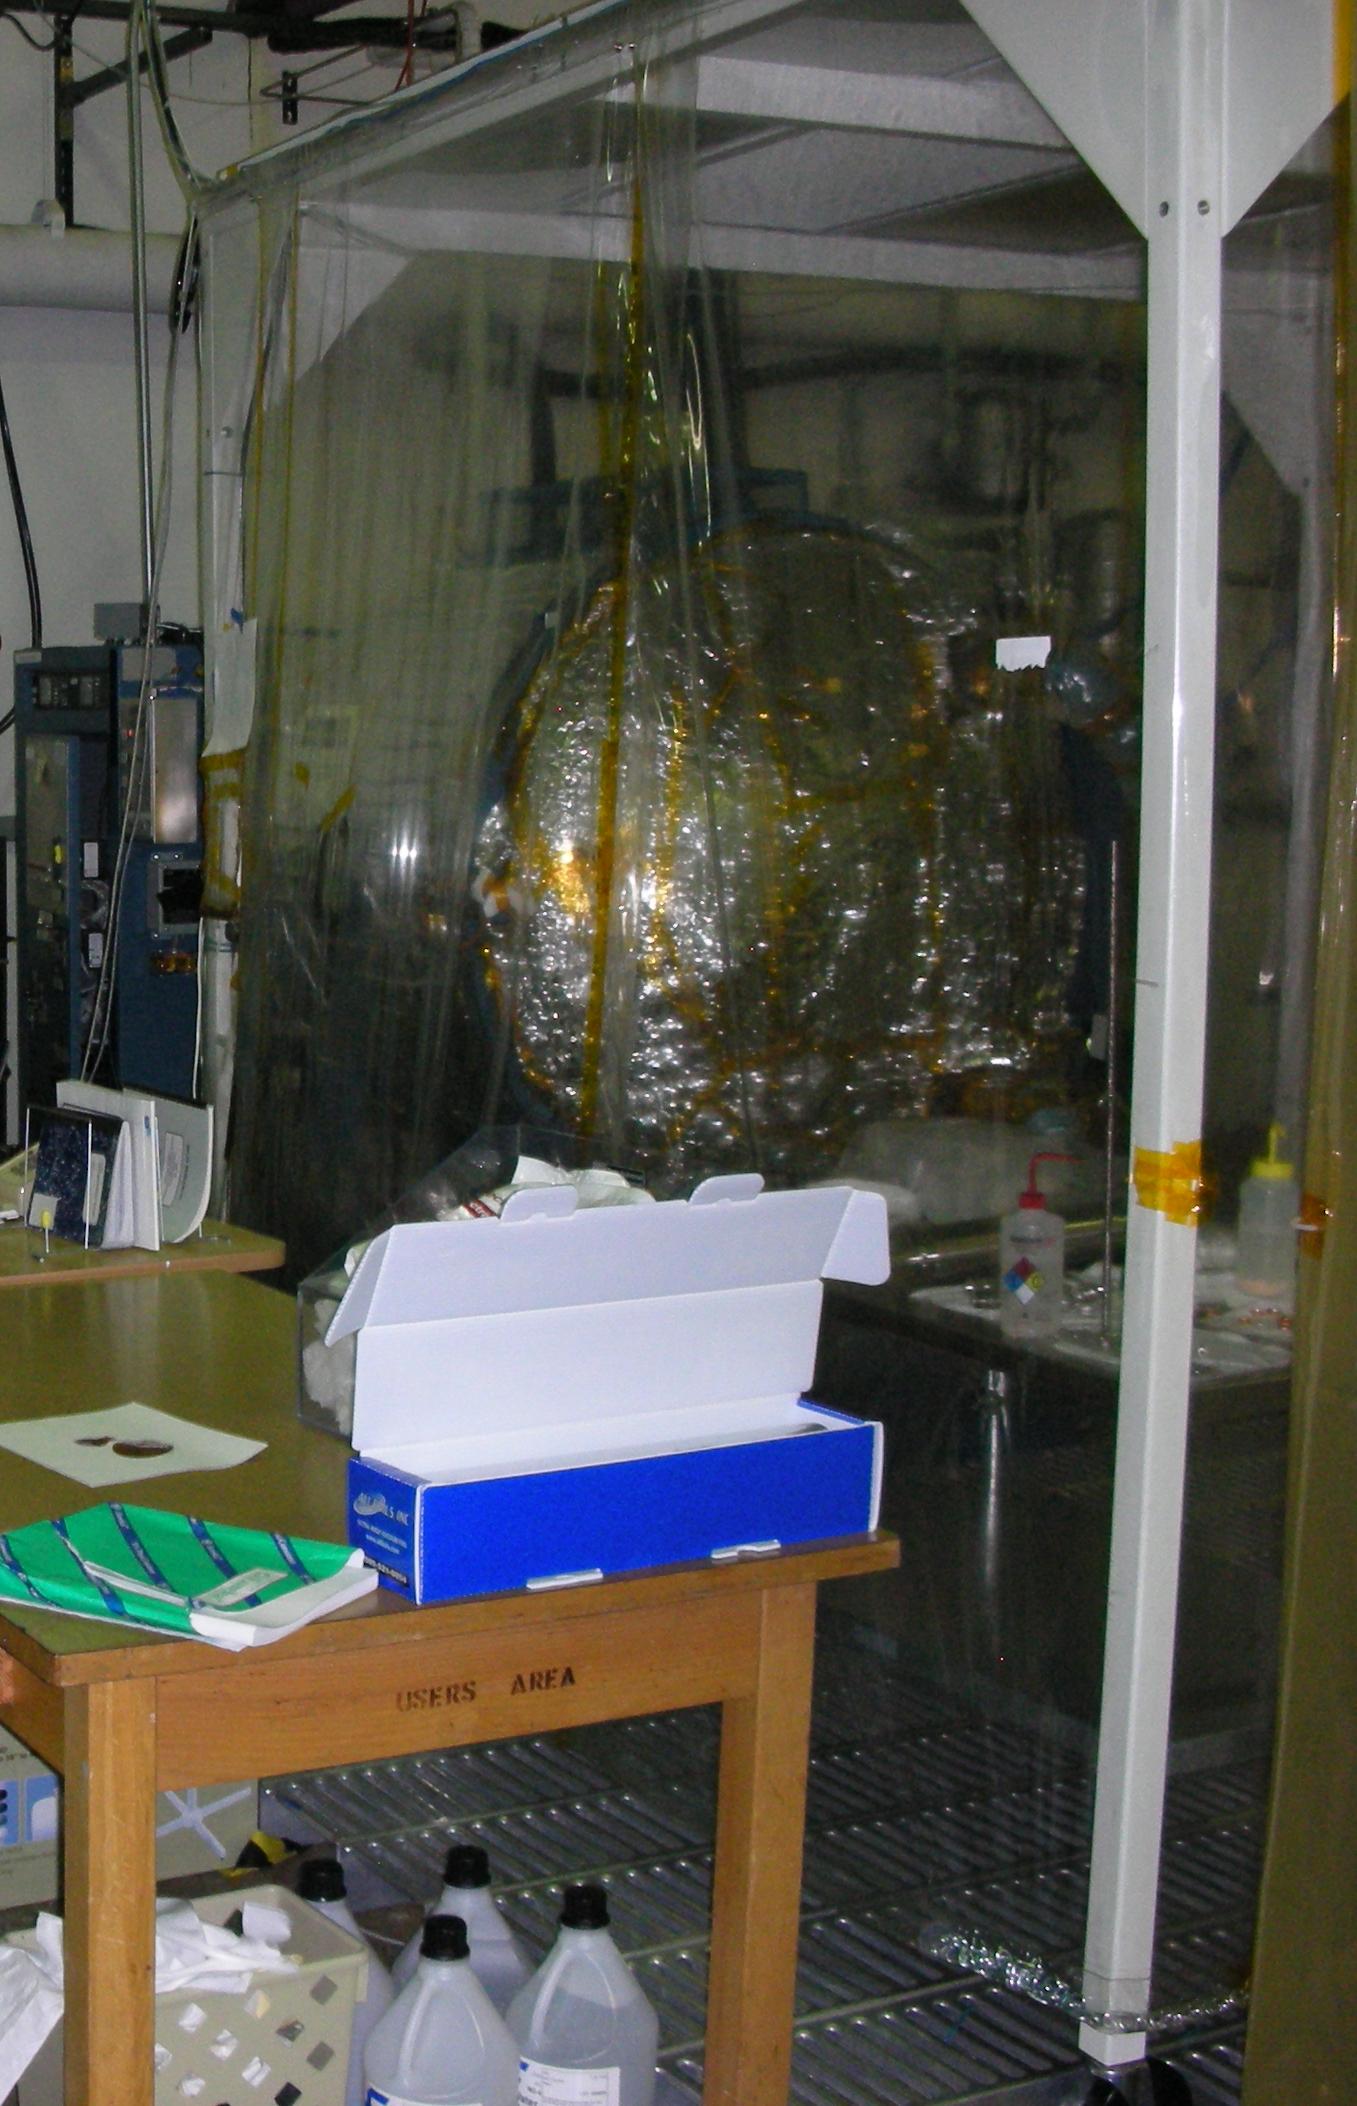
The LSL is the large object that is covered in foil in these pictures. The above picture shows the door of the chamber inside a special clean room designed to stop any contamination from occuring. This vacuum chamber is capable of creating near vacuum conditions inside and varying internal temperatures. Any entry or exit point on the chamber must be tightly sealed or the chamber will leak. If a leak occurs, the chamber could be contaminated with particulates. That is why the team goes through routine checks of all the chamber equipment. Repairs must be done with care to avoid contamination.
All testing equipment must be approved before it can be installed inside the chamber. In a vacuum, there is no source of external pressure holding the molecules in a substance together. Some materials with weak molecular bonds begin to lose molecules as they fly away into the vacuum. This process is called 'outgassing'. Team members are very careful to ensure that all testing equipment will not only work under vacuum, but will not outgass. Outgassing is undesirable because those particles can damage sensitive equipment and create noise in the data.
Pictured above: Mike Kaiser.
Additionally, all parts must be specially cleaned to get rid of all particulates, such as dust and skin particles, greases and oils, and even get rid of water molecules soaked into the material. Anyone who works on the inside of the chamber must wear special protective garments to prevent contamination from their clothing or hair. We call them bunny suits.
Inside the chamber, contaminating particles are captured by the cold plate. The cold plate is a piece of metal inside the chamber which is kept at an extremely cold temperature throughout the test. Any stray gas particles in the chamber will eventually come in contact with the cold plate, and condense or 'freeze' onto it. They stick to the plate and are prevented from contaminating the equipment. The plate is cooled by liquid nitrogen, so team members must refill the nitrogen tanks during testing.
.jpg)
Pictured above: Laura Kruger, Fran Lettang, Mike Kaiser, in bunny suits
Step 2: Prepare the Kapton.
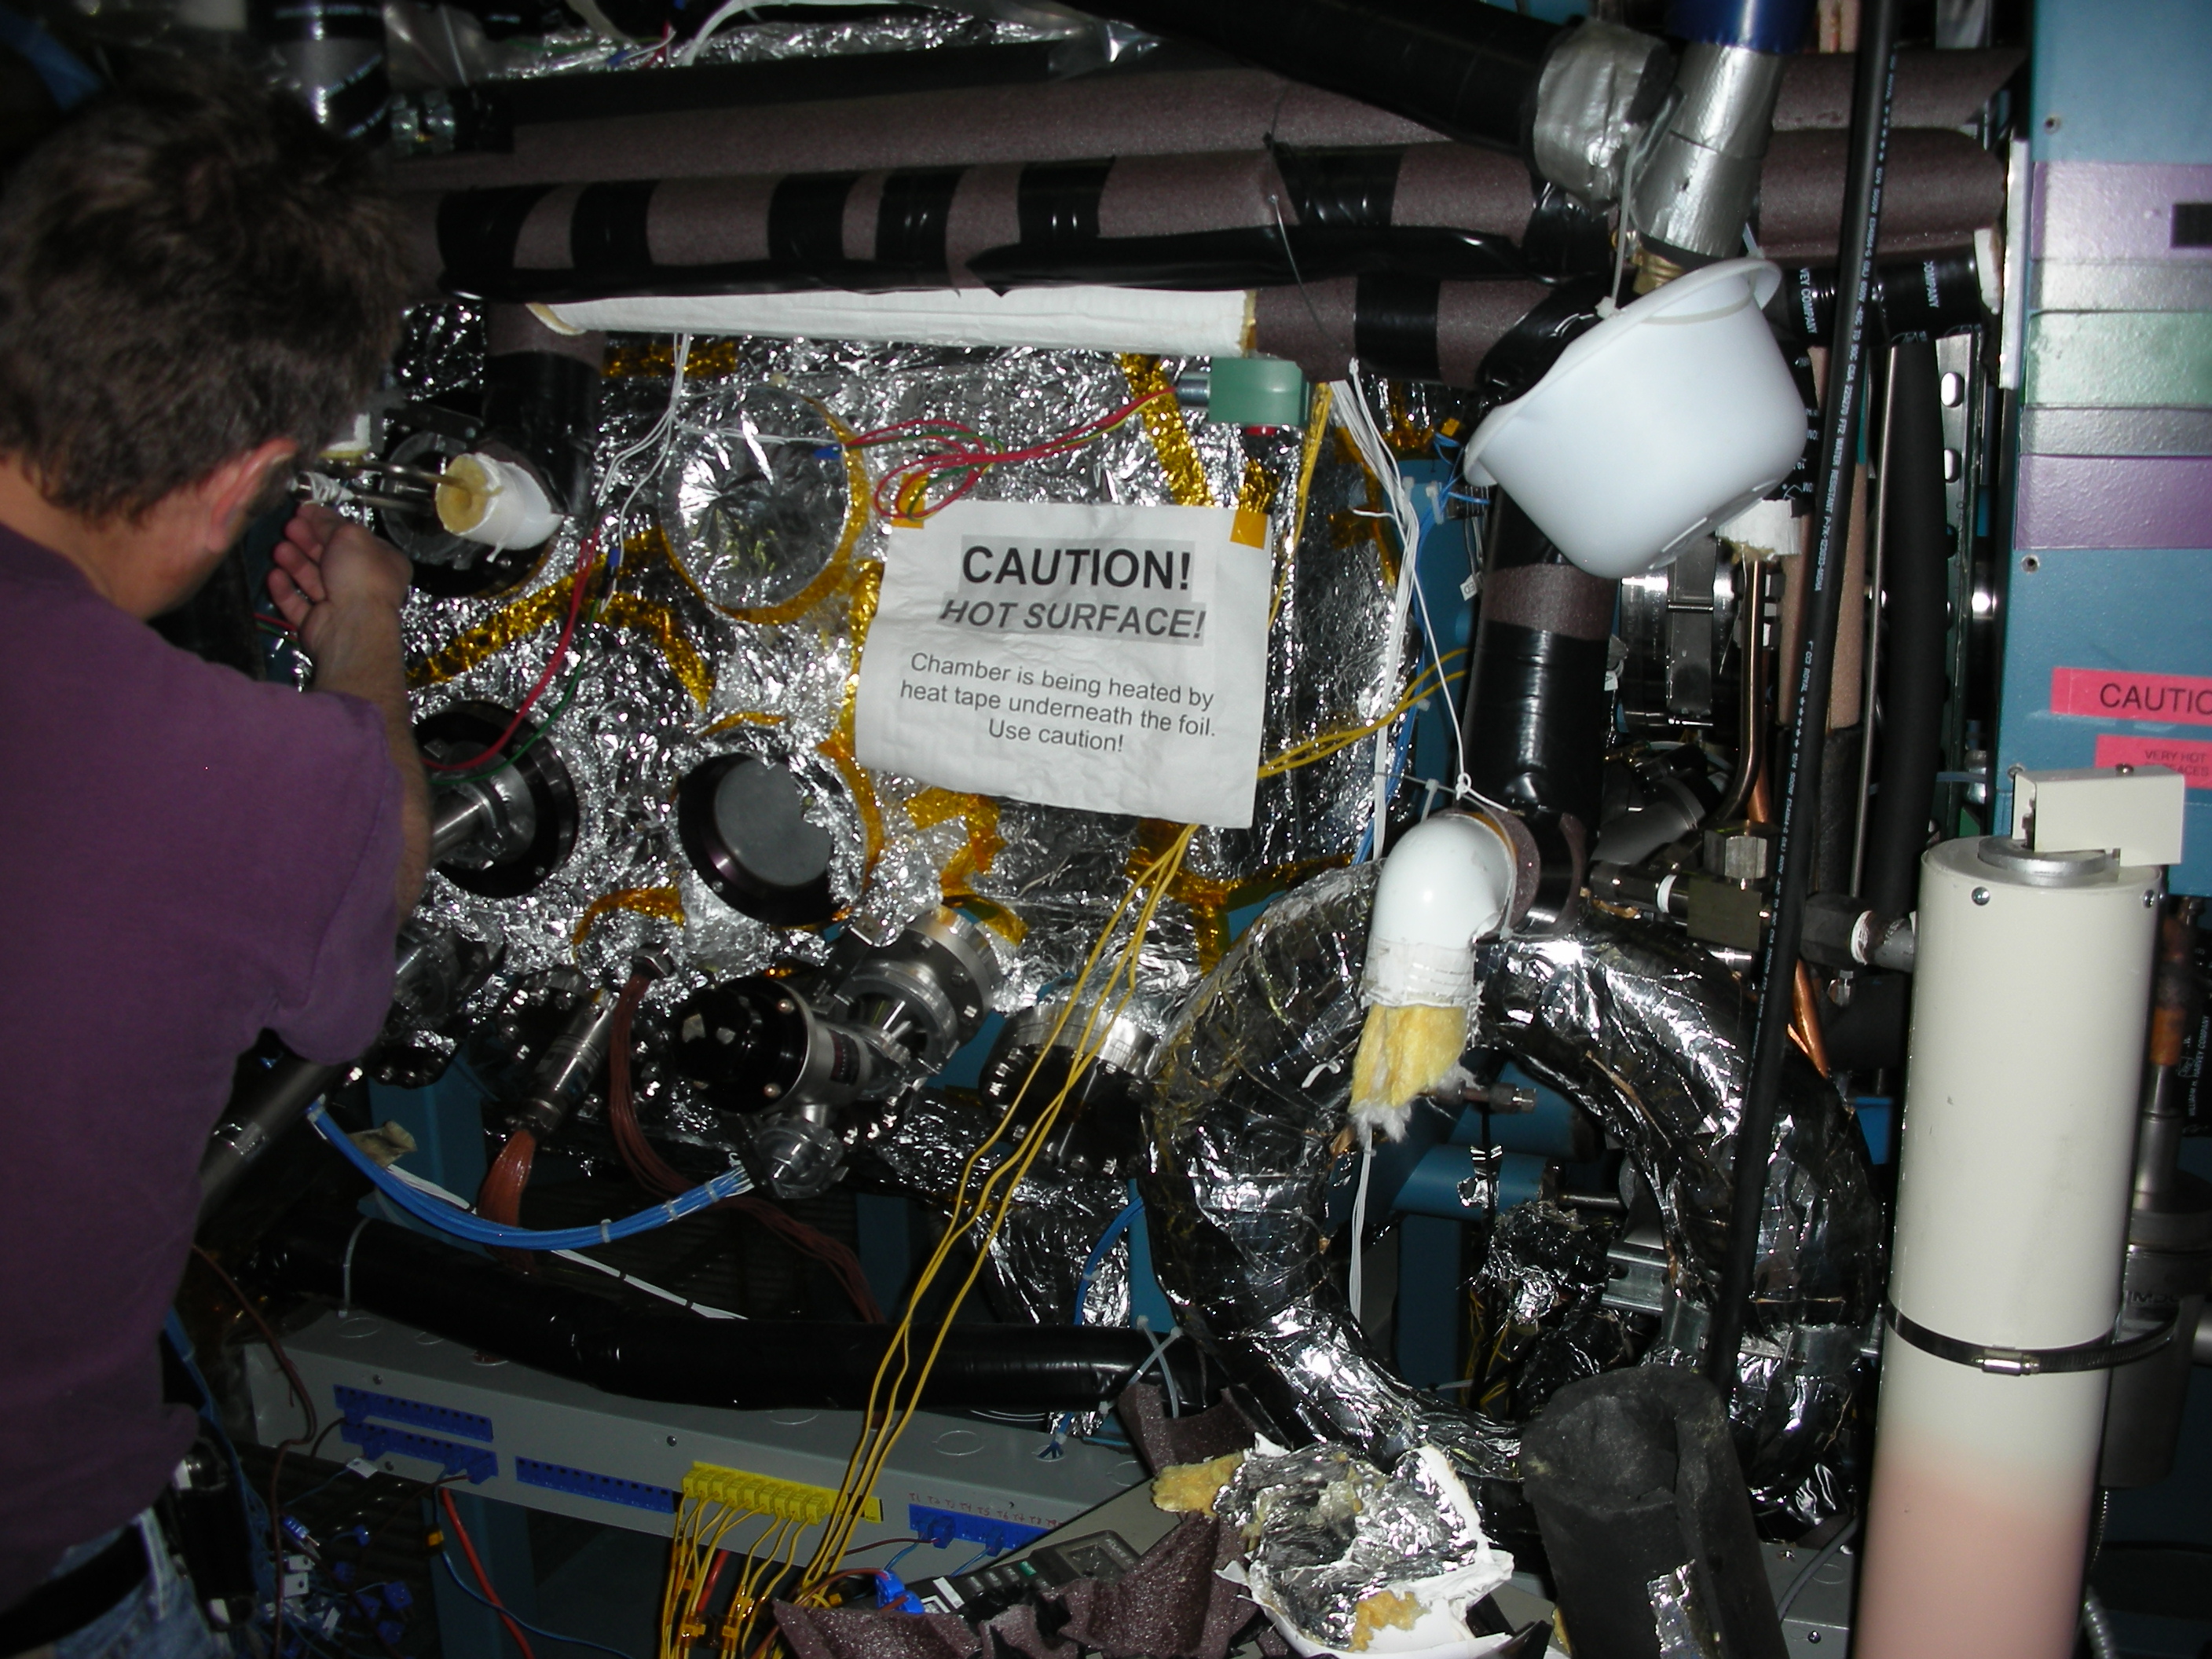
After the testing apparatus has been certified and cleaned, it can be installed in the chamber. Depending on the experiment, the position of our chamber camera and other equipment has to be moved. The temperature of the equipment is monitored by placing thermocouples on each piece, to ensure it stays within its operating temperature range. Below is the experimental apparatus used during our Embedded Resistor experiment.

During each experiment, data is being collected to monitor one or more variables used for analysis, as well as ensuring that the lunar environment is being properly simulated. The LUNAR team has to be very careful when they set up the apparatus, to make sure that the data is as noise-free and accurate as possible. The Kapton must be arranged as close to its operating position on the lunar surface as possible. The team must also ensure that the UV lamp beam is directed onto the Kapton film and other testing materials. Here is a close up of the equipment used in the Embedded Resistor test.

Step 3: Create the interfaces between the inside and outside of the chamber
Information must be transferred between the inside and the outside of the chamber for each experiment. Feed-throughs are special types of connections that allow wires to transmit signals through the chamber walls. All power must come through hard wires, which means that new cables must be made by the team for each experiment.
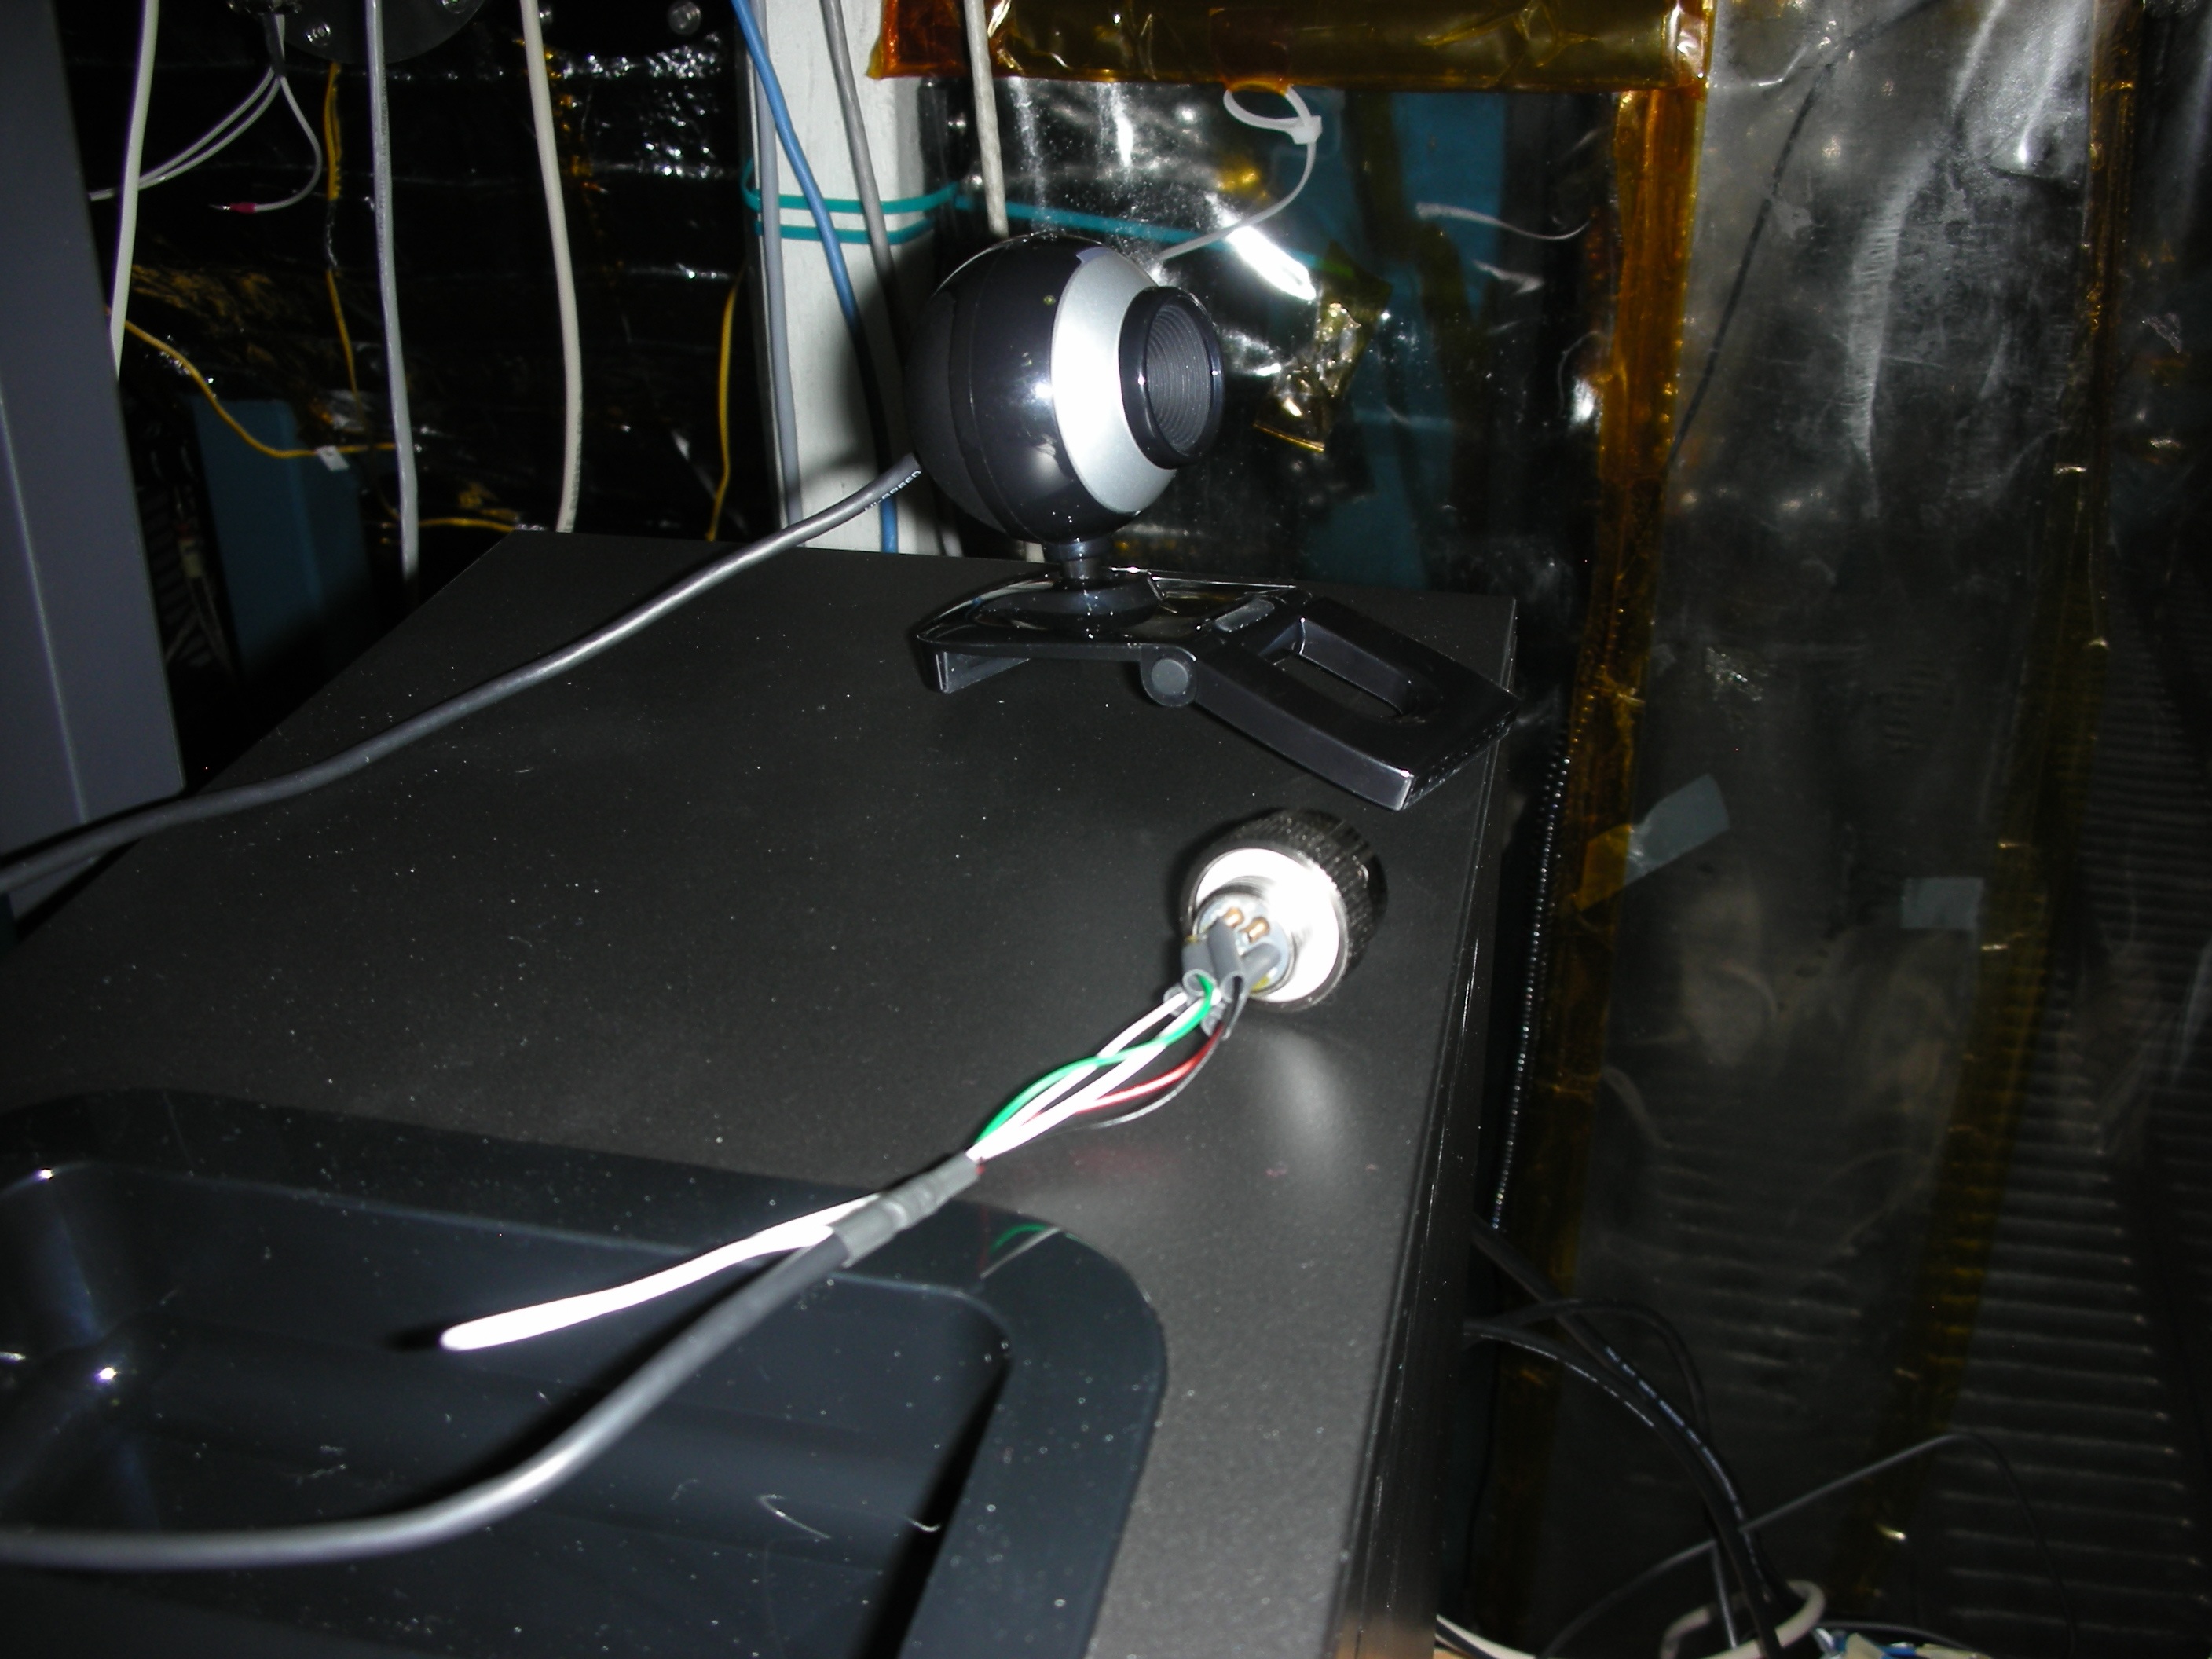
One type of signal passed by the feed-through is the thermocouple temperature data. A temperature dependant current passes through the feed-through and is read automatically by a computer. Other leads were created to control other instruments inside the chamber, depending on the experiment. For example, four leads were necessary to supply power to the micro rover motors. Additional leads were needed to power the chamber camera and get the video output files. Our chamber camera is a highly sensitive security camera placed inside a vacuum sealed box with a viewing window, pictured below.
Once everything is secure and has been tested under ambient (non-vacuum) conditions to ensure it is working properly, the chamber is ready to pump down.
Step 4: Reaching Vacuum
The LSL must be stepped down gradually before in order to get down to the required vacuum levels: approximately 10-7 torr, or 10 billion times less than atmospheric pressure. The LUNAR team must closely monitor temperature and pressure of the various pieces of equipment during this process to make sure nothing fails.
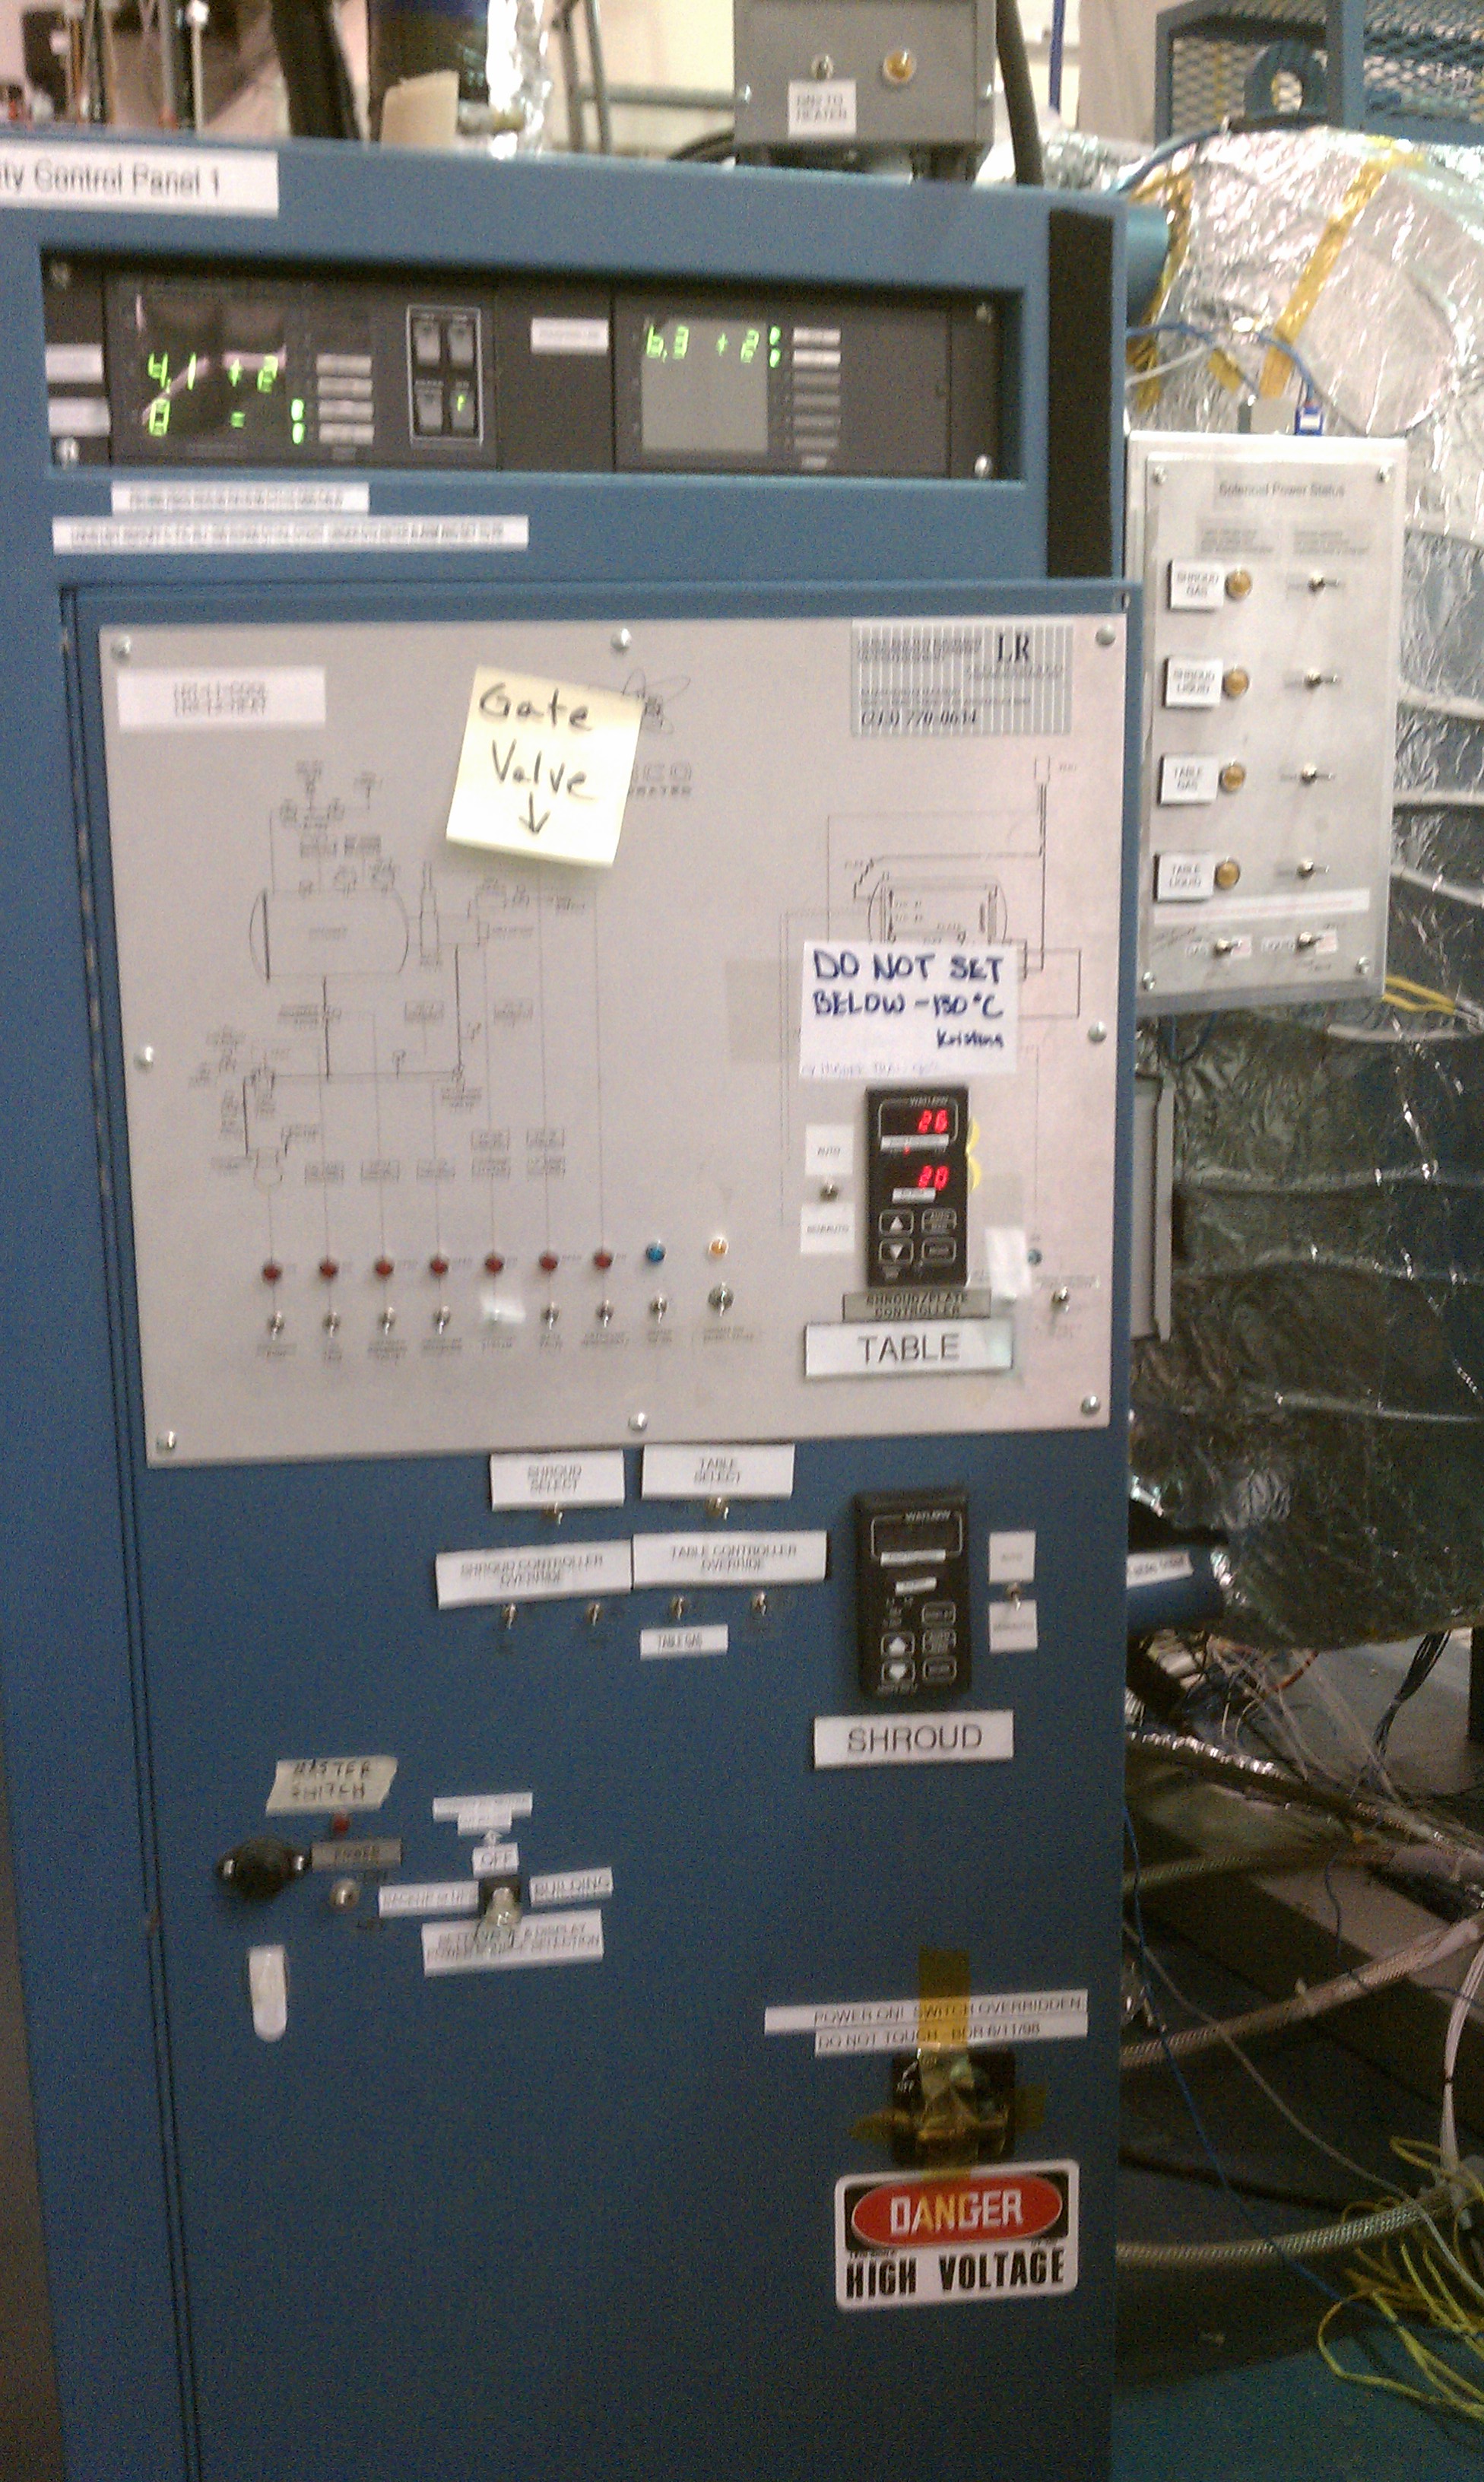
The switches for turning all of the LSL equipment on and off are found on the control panel, pictured below. The timing of when these switches are turned on and off is very important, so the team members have strict checklists they must follow. You can find a link to the checklists at the bottom of this page.
First, the team runs 99.9999% pure gas nitrogen through the chamber for several hours, so that the gas inside is all clean. Then, a pump is turned on to start creating a vacuum. It works by pushing the gas outside of the chamber, although this method is not very efficient. The vacuum chamber reaches full vacuum with several cold plates at different temperatures. The coldest cold plate condenses almost all gas, and is cooled by liquid helium to 4 degrees above absolute zero, or -452 F. However, it is the most delicate cold plate as well, so it is turned on last.
Step 5: Temperature Cycling and Data Collection
Once the chamber has reached full vacuum, temperature cycling can begin. For our daytime cycles, gas nitrogen is heated outside the chamber, and then run through tubing inside our thermally conductive plate inside. For the nighttime cycles, liquid nitrogen is run through the plate.
Several instruments outside the chamber begin to record data. For example, a multimeter was used to measure the conductivity of the copper coating that simulated the photon-collecting dipoles of the radio telescope during the Deployment Simulation experiment. The LUNAR team monitored and recorded this data for the entire duration of the experiment. The multimeter is pictured below.

Step 6: Shutdown
Once the test has reached its conclusion, the team fills the chamber up with nitrogen to bring it up to atmospheric pressure. It is now time to remove the testing materials from the chamber. Depending on the experiment, the team members may perform more tests to determine the durability of the materials.
The team is now ready to move into the data analysis phase of the experiment. You can check out the results from our tests by following the Previous Tests link below.
Please investigate the following links for more information:


